How to Start Sketching as an Adult: A Beginner's Guide (Even If You Can't Draw)
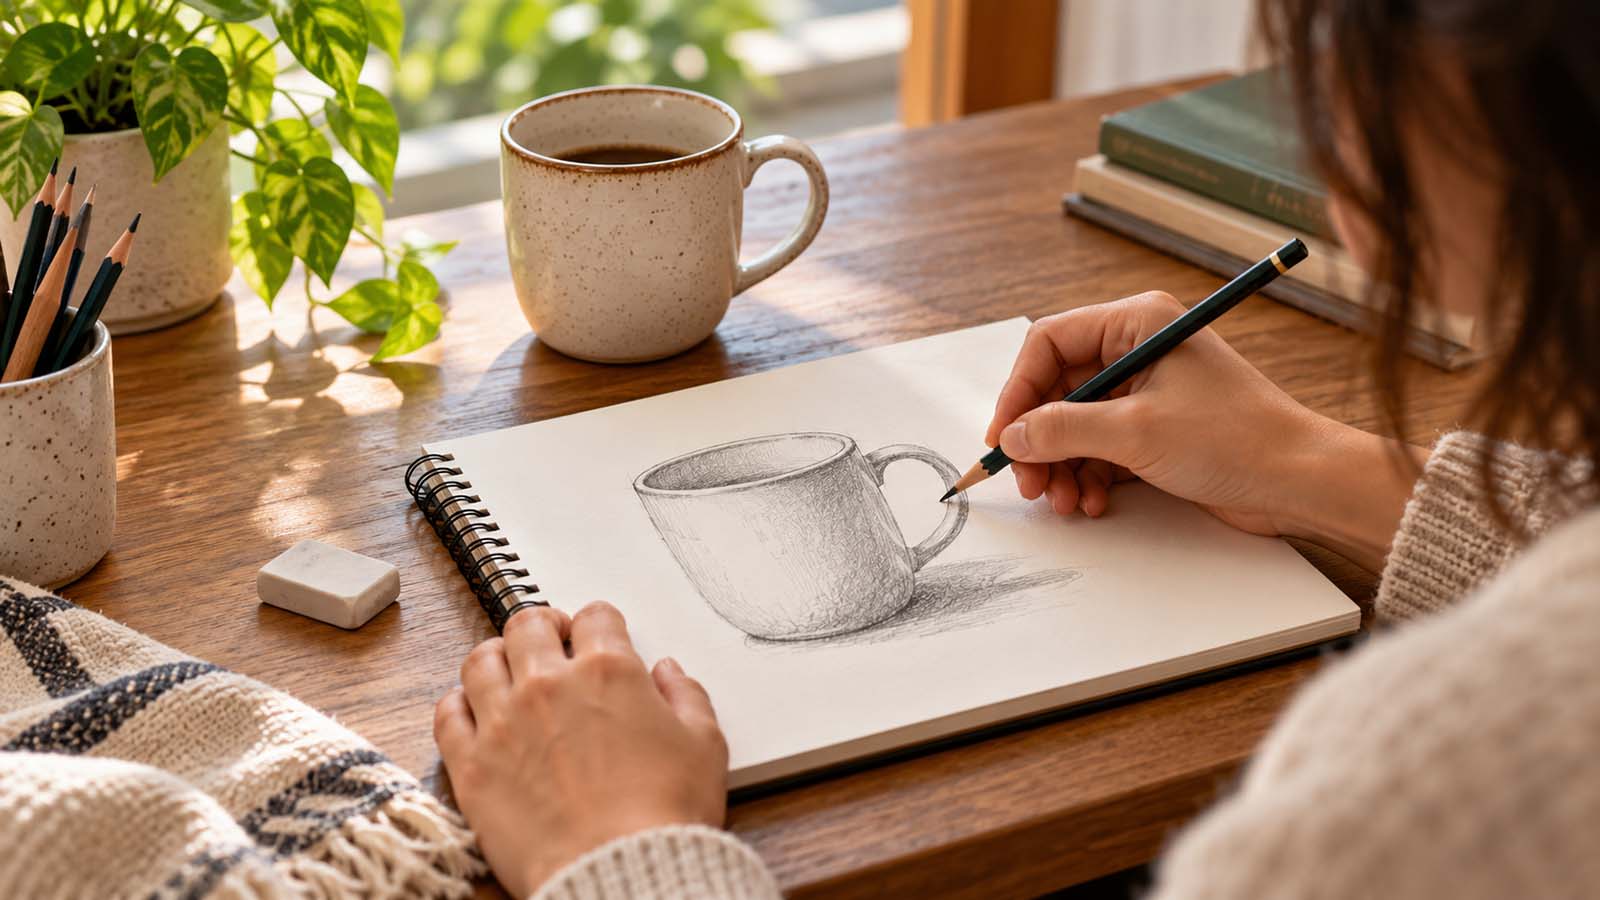
There's a mug on your desk.
You've looked at it hundreds of times. You know its color, its shape, and which side the handle is on.
But have you ever tried to draw it?
The moment you put pencil to paper, something strange happens. The handle looks wrong. The top becomes a crooked oval. The whole thing resembles a mug only if you explain what it's supposed to be.
You might laugh, put down the pencil, and decide you're simply not someone who can draw.
But that awkward little sketch isn't evidence that you lack talent.
It's evidence that you've started.
Sketching is something adults can learn through observation and practice. You don't need an artistic childhood, a collection of expensive pencils, or a natural ability to produce beautiful pictures.
You need a piece of paper, something to draw, and permission to be a beginner.
This guide will show you how to start sketching as an adult, what supplies you actually need, five simple techniques to try, and a seven-day plan to help you build a comfortable drawing habit.
Your first sketch doesn't have to be good.
It just has to exist.
Can You Really Learn to Sketch as an Adult?
Yes.
Sketching involves skills you can practice, including observing shapes, judging relative sizes, controlling lines, and noticing light and shadow.
You don't have to master these skills before you begin. You develop them by drawing.
Adults sometimes approach a new creative hobby with expectations they wouldn't place on a child learning the same activity.
You might expect your first drawing to resemble something you'd proudly frame. You might compare it with work made by people who have practiced for years.
That comparison makes starting unnecessarily difficult.
Instead, think of sketching as a way of exploring the world with a pencil.
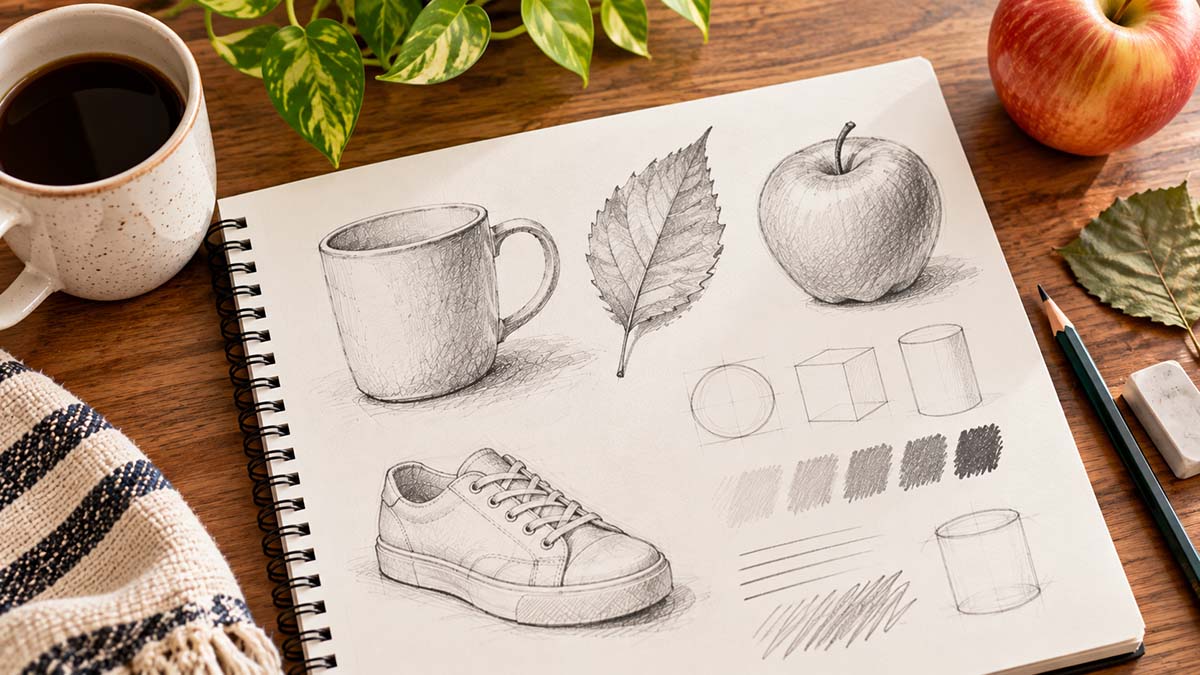
You might draw the shape of a leaf, the outline of your favorite shoes, or the arrangement of objects on your kitchen table.
The drawing doesn't need to be impressive to make the experience worthwhile.
If you're exploring creative activities beyond your phone, sketching is one of the approachable ideas in our 25 Offline Hobbies for Adults That Are Actually Fun.
What Do You Need to Start Sketching?
Less than you might expect.
Art shops offer countless pencils, sketchbooks, erasers, sharpeners, and drawing accessories. Those options can be enjoyable to explore later, but they're not essential when you're beginning.
1. An Ordinary Pencil
A standard HB pencil is enough for your first drawings.
If you already own a pencil, use it.
You can experiment with softer pencils, such as 2B or 4B, later if you want to create darker marks or explore shading.
For now, the goal is to become comfortable making lines.
2. Paper or a Sketchbook
Printer paper works perfectly well for practice.
A basic sketchbook is useful if you'd like to keep your drawings together and see how they change over time.
Choose something you won't be afraid to use.
An expensive sketchbook can sometimes feel too precious for experiments, especially when you're worried about making mistakes.
3. An Eraser
A simple eraser is helpful for adjusting shapes and removing unwanted marks.
But try not to erase every imperfect line.
Some early marks can help you understand how you arrived at the final shape.
4. Something Ordinary to Draw
You don't need a special subject.
Look around your room.
A mug, spoon, book, plant, shoe, or piece of fruit is enough.
Choose an object with a clear outline and relatively simple shape.
The First Skill: Learning to Look Before You Draw
One of the most useful habits in observational sketching is spending time looking at your subject.
It sounds obvious, but beginners often draw what they think an object looks like rather than what they're actually seeing.
Consider a mug.
You know the top is circular. But when you look at a mug sitting on a table, the opening usually appears as an oval because you're viewing it at an angle.
You know the handle curves outward. But its exact shape depends on where you're sitting.
Your brain has a familiar idea of a mug. Your eyes are showing you this particular mug from this particular viewpoint.
Sketching is an opportunity to pay attention to the difference.
Try a One-Minute Observation Exercise
Place a mug on a table.
Don't pick up your pencil yet.
Spend one minute looking at it.
Ask yourself:
Is the mug taller than it is wide?
How wide does the opening appear?
Where does the handle begin and end?
Which side looks darker?
What shape does the shadow make?
You don't need perfect answers.
The exercise is simply about slowing down and noticing details you might otherwise overlook.
Now you're ready to draw.
Five Simple Sketching Techniques for Beginners
You don't need to learn dozens of drawing methods at once.
These five techniques give you a practical foundation for sketching everyday objects.
1. Draw With Simple Shapes
Most objects can be broken down into basic shapes.
A mug might begin as a cylinder.
A book can be simplified into a rectangle.
A piece of fruit might start as a circle or oval.
A shoe may look complicated, but you can begin with its overall silhouette before adding smaller details.
Try this: Place an apple or orange on the table.
Lightly sketch its overall shape without worrying about the stem, texture, or shading.
Focus on making the drawing roughly as tall and wide as the object appears.
Then add one or two distinctive details.
This helps you establish the main form before getting distracted by smaller features.
2. Practice Contour Drawing
A contour is an outline or boundary that helps describe an object's shape.
Contour drawing encourages you to pay attention to the edges of what you're observing.
Try this: Place a leaf in front of you.
Look carefully at its outer edge.
Slowly move your pencil around the shape, following the changes you notice.
Don't worry if the line wobbles.
The purpose is to observe the leaf rather than create a flawless illustration.
For an additional challenge, try drawing the leaf without lifting your pencil from the page.
3. Compare Proportions
Proportion describes how the sizes of different parts relate to one another.
When sketching a mug, for example, you might compare its height with its width or the size of the handle with the main body.
Beginners often notice proportion problems only after adding lots of detail.
Try this: Draw a simple bottle.
Before adding the label or cap, compare the height of the bottle with its width.
Is it twice as tall as it is wide? Taller still?
You don't need exact measurements.
Start by making reasonable comparisons and adjusting your sketch as you observe.
4. Experiment With Light and Shadow
Shading helps communicate form and depth.
A rounded object may have lighter and darker areas depending on where the light falls.
You can explore this without complicated techniques.
Try this: Place a piece of fruit near a window.
Look for the lightest area, the darkest area, and the shadow it casts on the table.
Sketch the basic outline.
Then use gentle pencil strokes to make the darker areas slightly darker.
You can add more layers where needed.
Avoid pressing hard immediately. Building up tone gradually gives you more flexibility.
5. Use Quick Gesture Sketches
Gesture sketching focuses on capturing the general movement, direction, or character of a subject rather than its precise details.
It can be useful when drawing plants, people, animals, or objects with a strong overall shape.
Try this: Choose a houseplant.
Set a timer for one minute.
Sketch the main direction of the stems and the general arrangement of the leaves.
Don't attempt to draw every leaf perfectly.
Focus on the overall impression.
When the minute ends, stop.
A quick sketch is an exercise, not an unfinished masterpiece.
Your First 15-Minute Sketching Session
Let's put those ideas together.
For this exercise, we'll draw a mug.
You can substitute another simple household object if you prefer.
Minutes 1–3: Set Up and Observe
Place the mug on a table where you can see it clearly.
Sit comfortably with your paper and pencil.
Look at the overall shape.
Notice its height, width, opening, handle, and shadow.
Resist the urge to start drawing immediately.
Minutes 4–6: Draw the Basic Shape
Begin with light lines.
Sketch the main body of the mug.
Add an oval for the opening and a simple shape for the handle.
Don't worry about perfect curves.
If something looks wrong, adjust it gently.
Minutes 7–10: Look Again and Refine
Pause and compare your sketch with the actual mug.
Is the body too narrow?
Is the handle too large?
Does the opening look like an oval rather than a circle?
Make a few corrections.
Try to spend as much time looking at the mug as you spend looking at the paper.
Minutes 11–13: Add Simple Shading
Identify the darker side of the mug.
Use light pencil strokes to suggest the shadow.
You don't need to create a realistic three-dimensional drawing.
Just notice how light affects the object's appearance.
Minutes 14–15: Stop and Reflect
Put down your pencil.
Look at your sketch without immediately judging whether it's good.
Ask yourself:
What part was easiest?
What was difficult?
What did I notice about the mug that I'd never paid attention to before?
Write one sentence beside the drawing if you like.
Then keep the page.
A Seven-Day Sketching Plan for Complete Beginners
You don't need to practice for hours.
Try spending 10 to 15 minutes each day exploring one simple idea.
If you miss a day, continue whenever you're ready.
Day 1: Draw a Mug
Use the 15-minute exercise above.
Focus on the overall shape and the handle.
Don't add unnecessary details.
Today's goal: Finish one observational sketch.
Day 2: Draw Three Simple Objects
Choose three small household objects, such as a spoon, key, and piece of fruit.
Spend a few minutes on each.
Begin with the overall shape before adding details.
Today's goal: Notice how different objects can be simplified into lines and shapes.
Day 3: Sketch a Leaf
Find a fallen leaf or use a leaf from a houseplant without damaging it.
Draw its outer shape and a few main veins.
Pay attention to the curves and irregular edges.
Today's goal: Practice looking carefully at contours.
Day 4: Explore Light and Shadow
Choose a simple object near a window.
Draw its outline, then add gentle shading.
Try to identify the darkest area and the direction of the light.
Today's goal: Use pencil tone to suggest form.
Day 5: Draw Something From Your Daily Routine
Sketch an object you use regularly.
It might be your shoes, glasses, a book, or your favorite cup.
Choose something familiar and observe it as though you're seeing it for the first time.
Today's goal: Make sketching part of ordinary life.
Day 6: Try Five One-Minute Sketches
Choose a few objects around your room.
Set a timer for one minute per sketch.
Draw quickly, focusing on the overall form.
Don't erase or restart.
Today's goal: Become more comfortable making imperfect marks.
Day 7: Draw Your Day 1 Mug Again
Return to the same mug, ideally from a similar viewpoint.
Spend 15 minutes drawing it again.
Place the new sketch beside your first one.
Notice any differences.
Perhaps you paid more attention to proportions or became more confident making lines.
You might not see a dramatic improvement, and that's okay.
Today's goal: Reflect on what you've learned and decide whether you'd like to continue.
Common Sketching Mistakes Adults Make
Beginners often assume their biggest problem is a lack of talent.
More often, they're simply dealing with normal challenges that come with learning something new.
Pressing Too Hard With the Pencil
Heavy lines can be difficult to adjust.
Try beginning with light marks, especially when you're establishing the overall shape.
You can darken selected lines later.
Drawing Details Before the Main Shape
It's tempting to begin with an interesting detail, such as the handle of a mug or the pattern on a shoe.
But if the overall proportions are wrong, those details may be difficult to place.
Start with the big shapes.
Add smaller features once the main form looks reasonably close.
Erasing Every Mistake
Erasing can be useful, but constantly removing lines may interrupt your observation.
Try allowing a few exploratory marks to remain.
You can learn from seeing where you adjusted the drawing.
Comparing Your Sketches With Professional Artwork
A professional drawing may represent years of practice.
Your first sketch represents your first attempt.
Those aren't reasonable things to compare.
Instead, look at your own earlier pages.
Choosing Subjects That Feel Overwhelming
A detailed city street or complicated portrait may be frustrating when you're learning basic observation.
Start with simple objects.
As you become more comfortable, gradually try more challenging subjects.
Waiting Until You Have More Free Time
You might imagine that sketching requires a dedicated studio, a quiet afternoon, and a perfect setup.
It doesn't.
Ten minutes at a kitchen table can be enough.
What Should You Draw When You Run Out of Ideas?
One of the easiest ways to continue sketching is to keep a small list of subjects.
Here are 15 everyday things you can try:
Your favorite mug
A pair of shoes
A houseplant
An apple or orange
A stack of books
Your keys
A spoon
A folded piece of clothing
A chair
A window
A fallen leaf
A bottle
A small bag
A lamp
The view from your usual seat
You don't have to draw these in order.
Choose whichever subject interests you.
If an object seems complicated, simplify it.
You can sketch just its outline or one small part.
How to Make Sketching a Habit Without Turning It Into Homework
A new hobby is easier to enjoy when it fits naturally into your life.
You don't need to commit to drawing every day forever.
Instead, experiment with small routines.
You might sketch for ten minutes after breakfast, while sitting in the garden, or before settling down for the evening.
Keep your pencil and notebook somewhere easy to reach.
Choose subjects that are already around you.
And give yourself permission to stop when you're no longer enjoying the session.
A sketchbook doesn't need to become another task on your to-do list.
It can simply be a place where you spend a little time noticing things.
If you're still deciding which creative activity suits you, our guide to finding a hobby you actually enjoy can help you explore your preferences.
Do You Need Drawing Classes or Tutorials?
Not necessarily.
Many beginners can enjoy sketching independently using ordinary objects and simple exercises.
Classes, books, and tutorials can be useful if you want structured feedback or guidance on specific techniques.
But you don't have to enroll in a course before trying the hobby.
Start by discovering whether you enjoy drawing.
If you later want to learn perspective, portraits, landscapes, or more advanced shading, you can explore those subjects gradually.
There's no requirement to turn a relaxing creative activity into formal study.
What If Your Drawings Still Look Bad?
They might.
Especially at first.
A sketch can look awkward because the proportions are off, the lines are uncertain, or the shading doesn't quite make sense.
That doesn't mean the time was wasted.
You practiced looking carefully, making decisions, and translating what you observed onto paper.
You may also discover that you enjoy some parts of drawing more than others.
Perhaps you love sketching plants but dislike drawing buildings.
Perhaps you enjoy quick outlines more than detailed shading.
Those preferences can help shape your hobby.
And if sketching ultimately isn't something you enjoy, that's useful to know too.
You can explore other creative hobbies without treating the experience as a failure.
Your Sketchbook Doesn't Have to Impress Anyone
There's something freeing about making a drawing that nobody else needs to see.
It doesn't have to be posted online.
It doesn't have to become a finished artwork.
It doesn't even have to be particularly good.
It can simply be a record of a few minutes spent paying attention.
Start with the mug on your desk.
Draw its crooked handle.
Notice the shadow beneath it.
Keep the page.
Tomorrow, if you feel like it, draw something else.
That's how a sketchbook begins.
Ready to explore sketching further? Visit the Sketching Hobby Hub for more ideas and beginner-friendly inspiration.
Explore the Sketching Hobby Hub